cloudNet@ 팀의 가시다 님이 진행하는 테라폼 102 스터디 4주차 정리입니다.
4주차 내용: 테라폼 상태 및 격리 방안
1. 테라폼 State란?
- 상태 파일은 배포할 때마다 변경되는 프라이빗 API 로, 오직 테라폼 내부에서 사용하기 위한 것입니다.
- 상태 파일은 직접 편집하거나 직접 읽는 코드로 작성해서는 안됩니다.
✅ 팀 단위로 테라폼을 관리할 경우 상태 파일을 저장하는 공유 스토리지를 이용 합니다.
- 각 팀원이 동일한 테라폼 상태 파일 사용을 위해서, 공유 위치에 저장이 필요 하기 때문이죠.
✅ 상태 파일 잠금 ?
- 잠금 기능 없이 두 팀원이 동시에 테라폼을 실행 한다면 상태 파일을 동시 업데이트 하기 때문에 충돌 가능 합니다. ( race condition )
✅ 상태 파일 격리 ?
- dev 와 검증 stage 과 상용 prodction 각 환경에 대한 격리가 필요
🔔 S3 + DynamoDB 권장합니다 !
✅ 수동 오류 해결 : plan/apply 실행 시 마다 해당 백엔드에서 파일을 자동을 로드, apply 후 상태 파일을 백엔드에 자동 저장
✅ 잠금 : apply 실행 시 테라폼은 자동으로 잠금을 활성화, -lock-timout=<TIME> 로 대기 시간 설정 지정 가능
✅ 시크릿 : 대부분 원격 백엔드는 기본적으로 데이터를 보내거나 상태 파일을 저장할 때 암호화하는 기능을 지원
🔔 Git 같은 SCM No !
❌ 수동 오류 Manual error
- 테라폼을 실행하기 전에 최신 변경 사항을 가져오거나 ( pull ) 실행 하고 나서 push 하는 것을 잊기 쉽습니다(?).
- 팀의 누군가가 이전 버전의 상태 파일로 테라폼을 실행하고, 그 결과 실수로 이전 버전으로 롤백하거나 이전에 배포된 인프라를 복제하는 문제가 발생 할 수 있음.
❌ 잠금 Locking
- 대부분의 버전 관리 시스템은 여러 명의 팀 구성원이 동시에 하나의 상태 파일에 terraform apply 명령을 실행하지 못하게 하는 잠금 기능이 제공되지 않음.
❌ 시크릿 Secrets
- 테라폼 상태 파일의 모든 데이터는 평문으로 저장됨. 민감 정보가 노출될 위험.
2. 테라폼 State 실습
- s3 버킷 만들기
# S3 버킷 이름은 고유해야되어서 자신의 NICKNAME 을 사용할 것
NICKNAME=koo

cat <<EOT > backend.tf
provider "aws" {
  region = "ap-northeast-2"
}

resource "aws_s3_bucket" "mys3bucket" {
  bucket = "$NICKNAME-t101study-tfstate"
}

# Enable versioning so you can see the full revision history of your state files
resource "aws_s3_bucket_versioning" "mys3bucket_versioning" {
  bucket = aws_s3_bucket.mys3bucket.id
  versioning_configuration {
    status = "Enabled"
  }
}

output "s3_bucket_arn" {
  value       = aws_s3_bucket.mys3bucket.arn
  description = "The ARN of the S3 bucket"
}
EOT- terraform init && apply
- DynamoDB 만들기
provider "aws" {
  region = "ap-northeast-2"
}

resource "aws_s3_bucket" "mys3bucket" {
  bucket = "koo-t101study-tfstate"
}

# Enable versioning so you can see the full revision history of your state files
resource "aws_s3_bucket_versioning" "mys3bucket_versioning" {
  bucket = aws_s3_bucket.mys3bucket.id
  versioning_configuration {
    status = "Enabled"
  }
}

resource "aws_dynamodb_table" "mydynamodbtable" {
  name         = "terraform-locks"
  billing_mode = "PAY_PER_REQUEST"
  hash_key     = "LockID"

  attribute {
    name = "LockID"
    type = "S"
  }
}

output "s3_bucket_arn" {
  value       = aws_s3_bucket.mys3bucket.arn
  description = "The ARN of the S3 bucket"
}

output "dynamodb_table_name" {
  value       = aws_dynamodb_table.mydynamodbtable.name
  description = "The name of the DynamoDB table"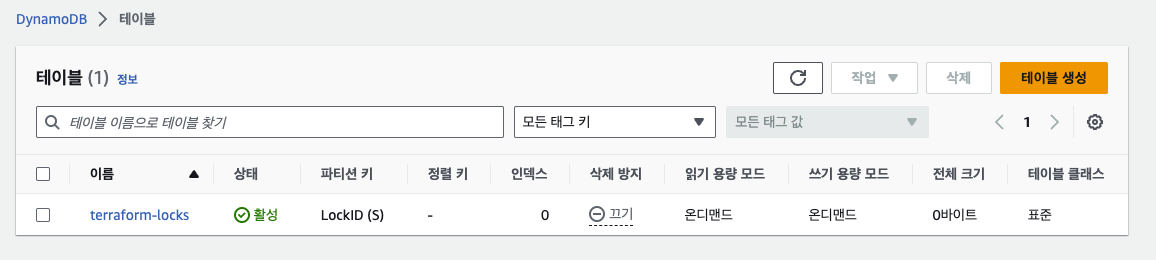
}- dynamodb 테이블 생성 완료
- 테라폼에서 DynamoDB 잠금을 사용하기 위해서는 LockID라는 기본 키가 있는 테이블을 생성해야됨
- 이런 형태로 생성이 되는데 이제 새로 디렉토리를 만들어서 간단하게 ec2 하나를 tf 파일로 배포 해보겠다.
cat <<EOT > vpc.tf
provider "aws" {
  region  = "ap-northeast-2"
}

resource "aws_vpc" "myvpc" {
  cidr_block       = "10.10.0.0/16"
  enable_dns_support   = true
  enable_dns_hostnames = true

  tags = {
    Name = "t101-study"
  }
}

resource "aws_subnet" "mysubnet1" {
  vpc_id     = aws_vpc.myvpc.id
  cidr_block = "10.10.1.0/24"

  availability_zone = "ap-northeast-2a"

  tags = {
    Name = "t101-subnet1"
  }
}

resource "aws_subnet" "mysubnet2" {
  vpc_id     = aws_vpc.myvpc.id
  cidr_block = "10.10.2.0/24"

  availability_zone = "ap-northeast-2c"

  tags = {
    Name = "t101-subnet2"
  }
}


resource "aws_internet_gateway" "myigw" {
  vpc_id = aws_vpc.myvpc.id

  tags = {
    Name = "t101-igw"
  }
}

resource "aws_route_table" "myrt" {
  vpc_id = aws_vpc.myvpc.id

  tags = {
    Name = "t101-rt"
  }
}

resource "aws_route_table_association" "myrtassociation1" {
  subnet_id      = aws_subnet.mysubnet1.id
  route_table_id = aws_route_table.myrt.id
}

resource "aws_route_table_association" "myrtassociation2" {
  subnet_id      = aws_subnet.mysubnet2.id
  route_table_id = aws_route_table.myrt.id
}

resource "aws_route" "mydefaultroute" {
  route_table_id         = aws_route_table.myrt.id
  destination_cidr_block = "0.0.0.0/0"
  gateway_id             = aws_internet_gateway.myigw.id
}

EOT
cat <<EOT > sg.tf
resource "aws_security_group" "mysg" {
vpc_id = aws_vpc.myvpc.id
name = "T101 SG"
description = "T101 Study SG"
}
resource "aws_security_group_rule" "mysginbound" {
type = "ingress"
from_port = 0
to_port = 80
protocol = "tcp"
cidr_blocks = ["0.0.0.0/0"]
security_group_id = aws_security_group.mysg.id
}
resource "aws_security_group_rule" "mysgoutbound" {
type = "egress"
from_port = 0
to_port = 0
protocol = "-1"
cidr_blocks = ["0.0.0.0/0"]
security_group_id = aws_security_group.mysg.id
}
EOTcat <<EOT > sg.tf
resource "aws_security_group" "mysg" {
vpc_id = aws_vpc.myvpc.id
name = "T101 SG"
description = "T101 Study SG"
}
resource "aws_security_group_rule" "mysginbound" {
type = "ingress"
from_port = 0
to_port = 80
protocol = "tcp"
cidr_blocks = ["0.0.0.0/0"]
security_group_id = aws_security_group.mysg.id
}
resource "aws_security_group_rule" "mysgoutbound" {
type = "egress"
from_port = 0
to_port = 0
protocol = "-1"
cidr_blocks = ["0.0.0.0/0"]
security_group_id = aws_security_group.mysg.id
}
EOT- 이후에 테라폼 apply 진행 하면 먼저 버킷에 아무 데이터가 없는것을 확인할수 있다.
# [터미널1] S3 버킷 모니터링 = data 0
NICKNAME=koo
while true; do aws s3 ls s3://$NICKNAME-t101study-tfstate --recursive --human-readable --summarize ; echo "------------------------------"; date; sleep 1; done- 하지만 backend를 사용하여 테라폼 init 진행 하게 되면 s3에 tf state들을 담게 된다.
NICKNAME=koo
cat <<EOT > backend.tf
terraform {
  backend "s3" {
    bucket = "$NICKNAME-t101study-tfstate"
    key    = "dev/terraform.tfstate"
    region = "ap-northeast-2"
    dynamodb_table = "terraform-locks"
    # encrypt        = true
  }
}
EOT- 진행 후 다시 S3 버킷 모니터링 하면 데이터가 담김
# [터미널1] S3 버킷 모니터링 = data 1
NICKNAME=koo
while true; do aws s3 ls s3://$NICKNAME-t101study-tfstate --recursive --human-readable --summarize ; echo "------------------------------"; date; sleep 1; done
'DevOps > Terraform' 카테고리의 다른 글
| [T102 3주차] (9) 테라폼 도전과제 (0) | 2023.07.17 |
|---|---|
| [T102 3주차] (8) 테라폼 기본사용법(3) (0) | 2023.07.17 |
| [T102 2주차] (7) 도전과제 (1) | 2023.07.11 |
| [T102 2주차] (6) 테라폼 반복문 (0) | 2023.07.10 |
| [T102 2주차] (5) 테라폼 VPC (1) | 2023.07.06 |


