
왜 Spring Cloud Config를 사용할까?
지금까지 배포한 모든 프로젝트의 환경설정을 담당하는 파일은 application.yml로 소스와 함께 저장 되서 배포했습니다. 하지만 이러한 방식은 12 factor에 따르면 현대적인 어플리케이션 작성 원칙에 위배 되기 됨으로 Spring Cloud Config를 활용하여 설정 파일을 외부로 분리 하는 아키텍처를 활용 합니다.
이렇게 활용하게 되면 개발/테스트 환경 그리고 운영 환경까지 모든 환경 구성을 간편하게 관리할 수 있습니다. 또한 환경변수가 바뀌었을때 어플리케이션을 다시 빌드하고 배포할 필요가 없기 때문에 개발 생산성에 좋은 영향을 줍니다.
설정을 위한 별도의 서버를 구성하기 때문에 실행 중인 애플리케이션이 셧다운 후 다시 빌드할 필요 없이 실행 중에 설정값 변경을 할수 있습니다. 설정 서버만 변경하고 애플리케이션은 api를 통해서 갱신하도록 해주기만 하면 됩니다. 따라서 설정이 바뀔 때마다 빌드와 배포가 필요 없는 구조로 어플리케이션을 설계 할수 있습니다.
목차
- Config server 프로젝트 설정
- Spring Cloud Config Repository 프로젝트 설정
- Spring Cloud Config Client 프로젝트 설정
1. Config Server 프로젝트 설정
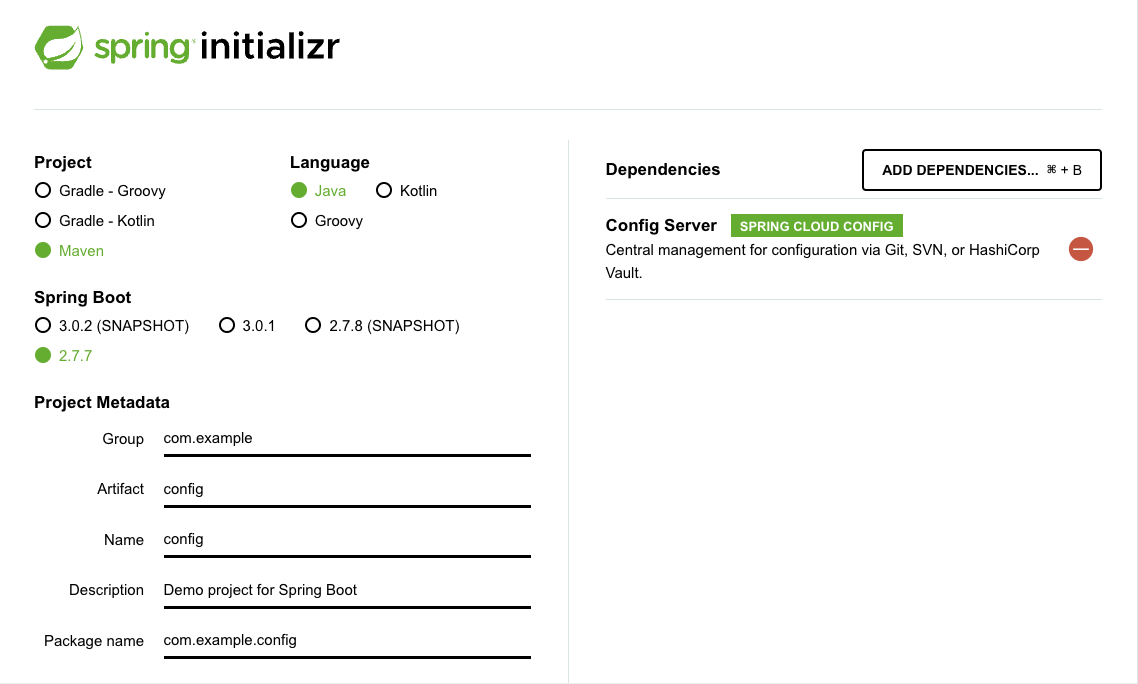
- 다운로드 받을때 2.7.7 버전 스프링 부트를 받아야 Java Version 11과 호환성 에러를 일으키지 않는다.
- 다운로드 받은 config 서버를 빌드하고 그 이후에 @EnableConfigServer 어노테이션을 통해 활성화 시킨다.
- application.yml을 작성하여 포트 설정과 어떤 레포지토리를 look 할지 설정한다.
# application.yaml
server:
  port: 8088
spring:
  cloud:
    config:
      server:
        git:
          uri: https://github.com/themapisto/spring-cloud-config-repository
이정도로 간단하게 config서버를 구동할수 있다.
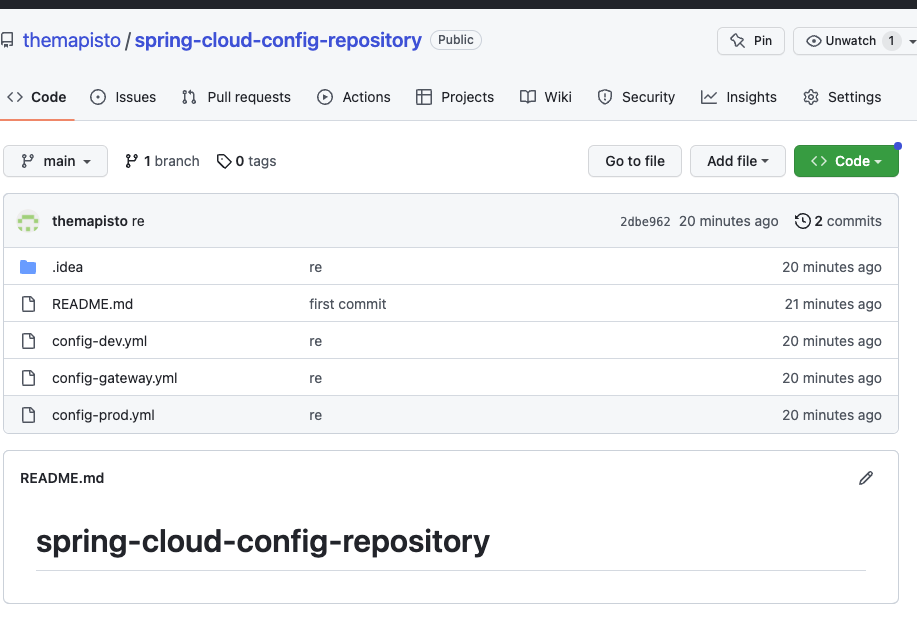
2. Config repository 생성
config를 담아둘 레포지토리를 생성하겠습니다.
반드시 별도의 레포지토리를 생성하여 해당 git url을 config 서버에 코드로 기록해 주는 방식을 사용합니다.
저는 다음과 같이 그동안 사용했던 모든 application.yaml을 이와 같이 config-repository에 카피 했습니다.
config-dev.yml 로 작성된 환경변수 파일은 config 서버가 기동되면
localhost:8088/config/dev 와 같은 방식으로 호출 할수 있습니다.
- 호출 시 해당 config 파일을 확인할수 있습니다.

3. Spring Cloud Config Client 프로젝트 설정
- 프로젝트 빌드 (spring initializr )

- application.yml
server:
  port: 8089
spring:
  profiles: # 여기에 지정해도 되고, 실행할 때 지정해도 된다.
    active: dev
  application:
    name: config
  config:
    uri: http://config.taskoo.net
management:
  endpoints:
    web:
      exposure:
include: refresh- service Layer 작성 (Controller, Service)
## ConfigController.java
package com.example.sccclient;

import org.springframework.beans.factory.annotation.Autowired;
import org.springframework.web.bind.annotation.GetMapping;
import org.springframework.web.bind.annotation.RestController;

@RestController
public class ConfigController {

    private final StaticConfigService configStaticService;
    @Autowired
    public ConfigController(StaticConfigService configStaticService) {
        this.configStaticService = configStaticService;
    }

    @GetMapping(value = "/static")
    public Object getConfigFromStatic() {
        return configStaticService.getConfig();
    }

}
## StaticConfigService.java
package com.example.sccclient;

import org.springframework.beans.factory.annotation.Value;
import org.springframework.stereotype.Service;

import java.util.HashMap;
import java.util.Map;

@Service
public class StaticConfigService {

    @Value("${spring.application.name}")
    private String name;
    @Value("${server.port}")
    private String port;

    public Map<String, String> getConfig() {
        Map<String, String> map = new HashMap<>();
        map.put("name", name);
        map.put("port", port);
        return map;
    }
}
이와 같이 HashMap 형태로 spring-cloud-config-repository에 저장된 profile : dev name: config (dev-config) 의
application.yml파일을 당겨올수 있었다. 추가로 포트 역시 8089포트로 서버가 띄워지는것이 아니라 dev-config의 프로필에 저장된
8015 포트로 서버가 작동되는것을 확인할수 있었다.
'개발스터디 > MSA 스터디 (22년)' 카테고리의 다른 글
| [Spring Cloud] (1) 서비스 디스커버리 쿠버네티스 기능과 비교 (0) | 2023.05.27 |
|---|---|
| [MSA 1.0] (7) Spring Cloud 어플리케이션을 kubernetes로 배포하기 (0) | 2022.12.08 |
| [MSA 1.0] (6) Spring Cloud 어플리케이션을 Docker file로 배포하기 (0) | 2022.12.08 |
| [MSA 1.0] (5) RestTemplate 개념과 사용법 (0) | 2022.12.06 |
| Java MSA를 위한 Spring Cloud 환경 구축하기(Eureka) (1) | 2022.06.30 |


